Create your online Digital Menu with PocketChef
One of the advantages of using PocketChef is having your Digital Menu present on the Internet 24 hours a day. Using just one link you can share your menu with your customers with all your contact details, increasing your sales and your market share. Let's learn in this tutorial how to configure a Digital Menu and choose which products will be displayed on it.
Steps for Digital Menu
There are the steps needed to have your Digital Menu online:
- Digital Menu configuration
- Recipes configuration
- Share the link
Let's follow this step-by-step guide to set your Digital Menu online!
1. Digital Menu configuration
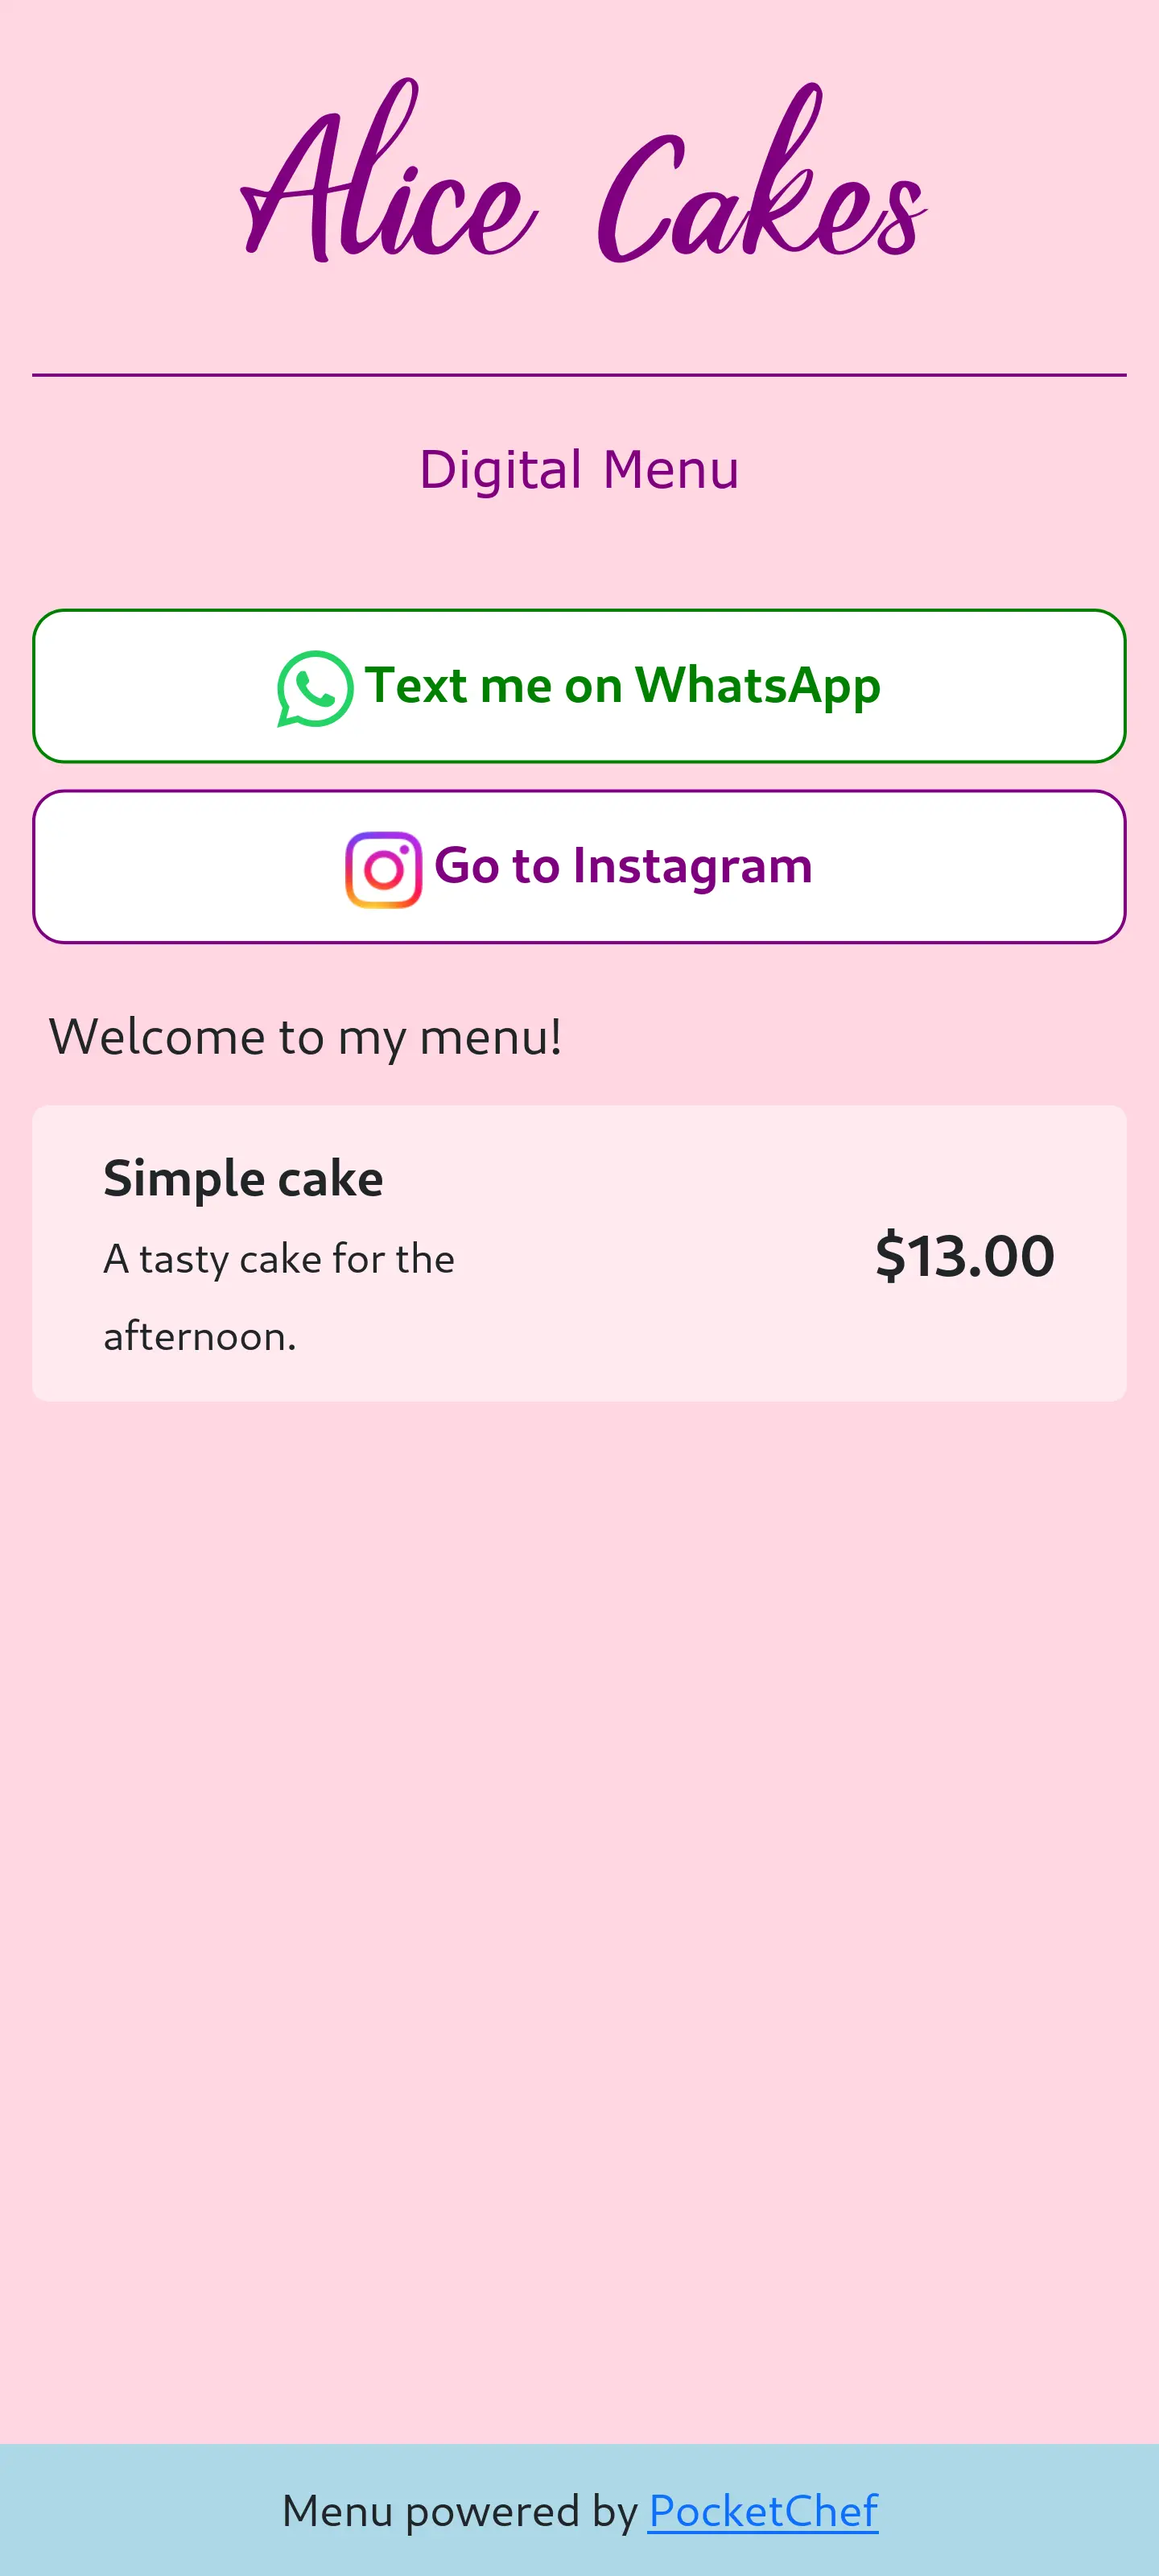
The first thing to do is configure your Digital Menu. To do this, access the option Digital Menu in the side menu. You will see a screen for menu configuration. Start by checking the box Enable Digital Menu. With this box you can activate and deactivate your Digital Menu at any time.
Just below you will see a text box for the link to the Digital Menu. There you will set the link that will be used so that your customers can access your menu. The box will already be filled with the address of PocketChef so you just need to complete it with a name to the link.
In the , the user chose the name "alice_cake" so that the link to the Digital Menu will be
pocket-chef.com/menu/alice_cake
pocket-chef.com/menu/alice_cake
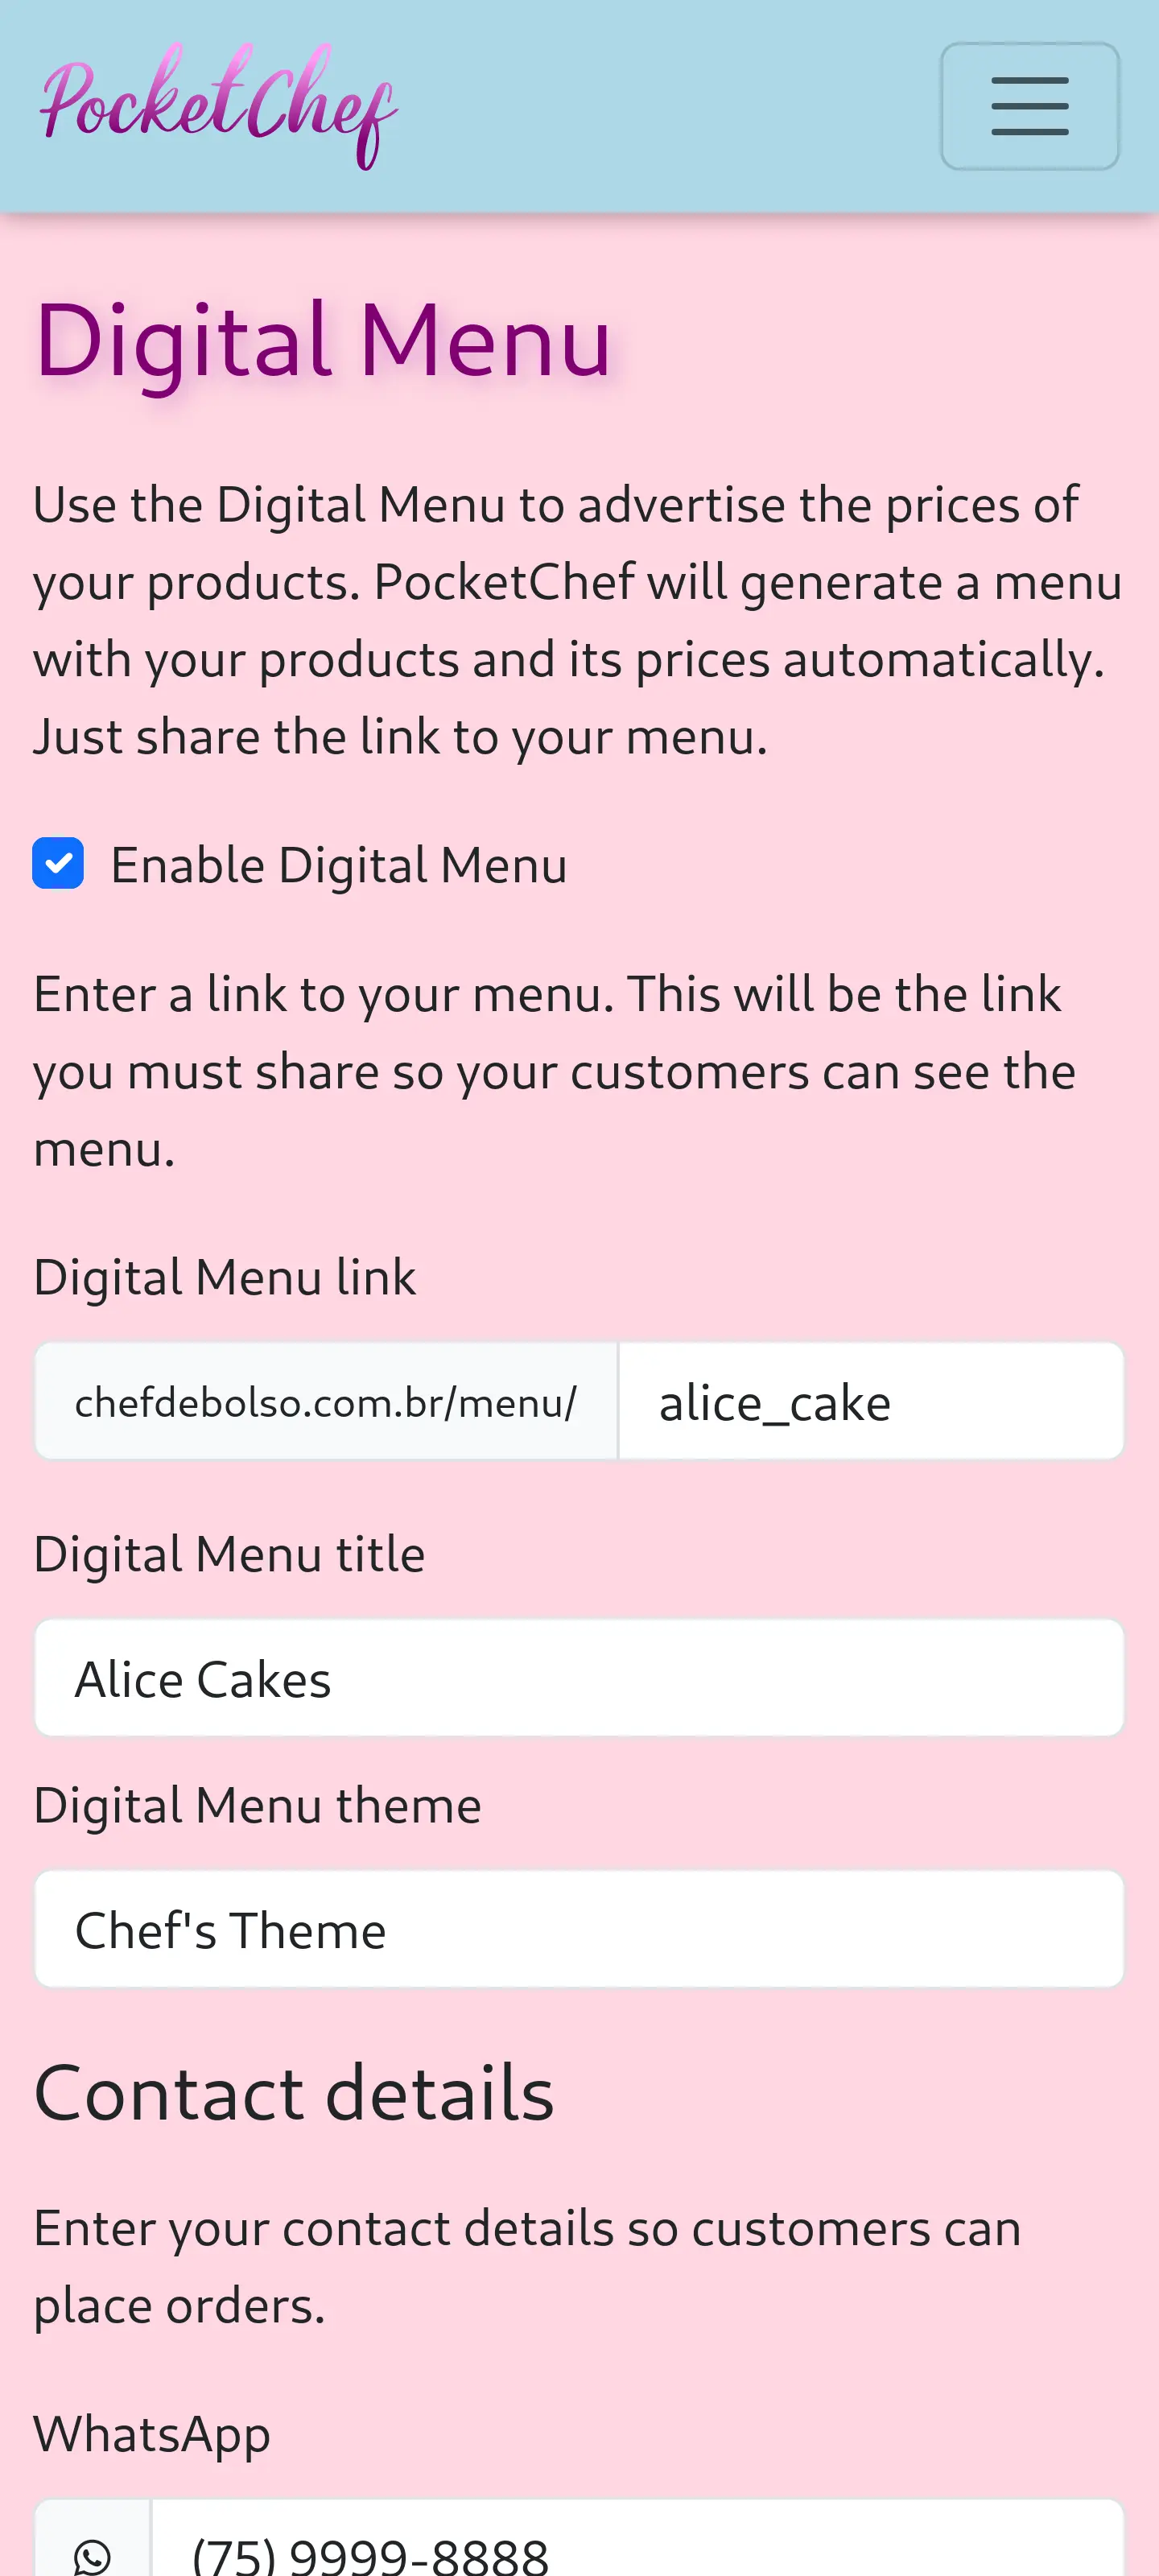
After choosing your link you must set a Digital Menu title to be displayed at the top of your menu and also a Digital Menu theme. The theme will change the way your menu is presented. You can switch them and test by opening the link.
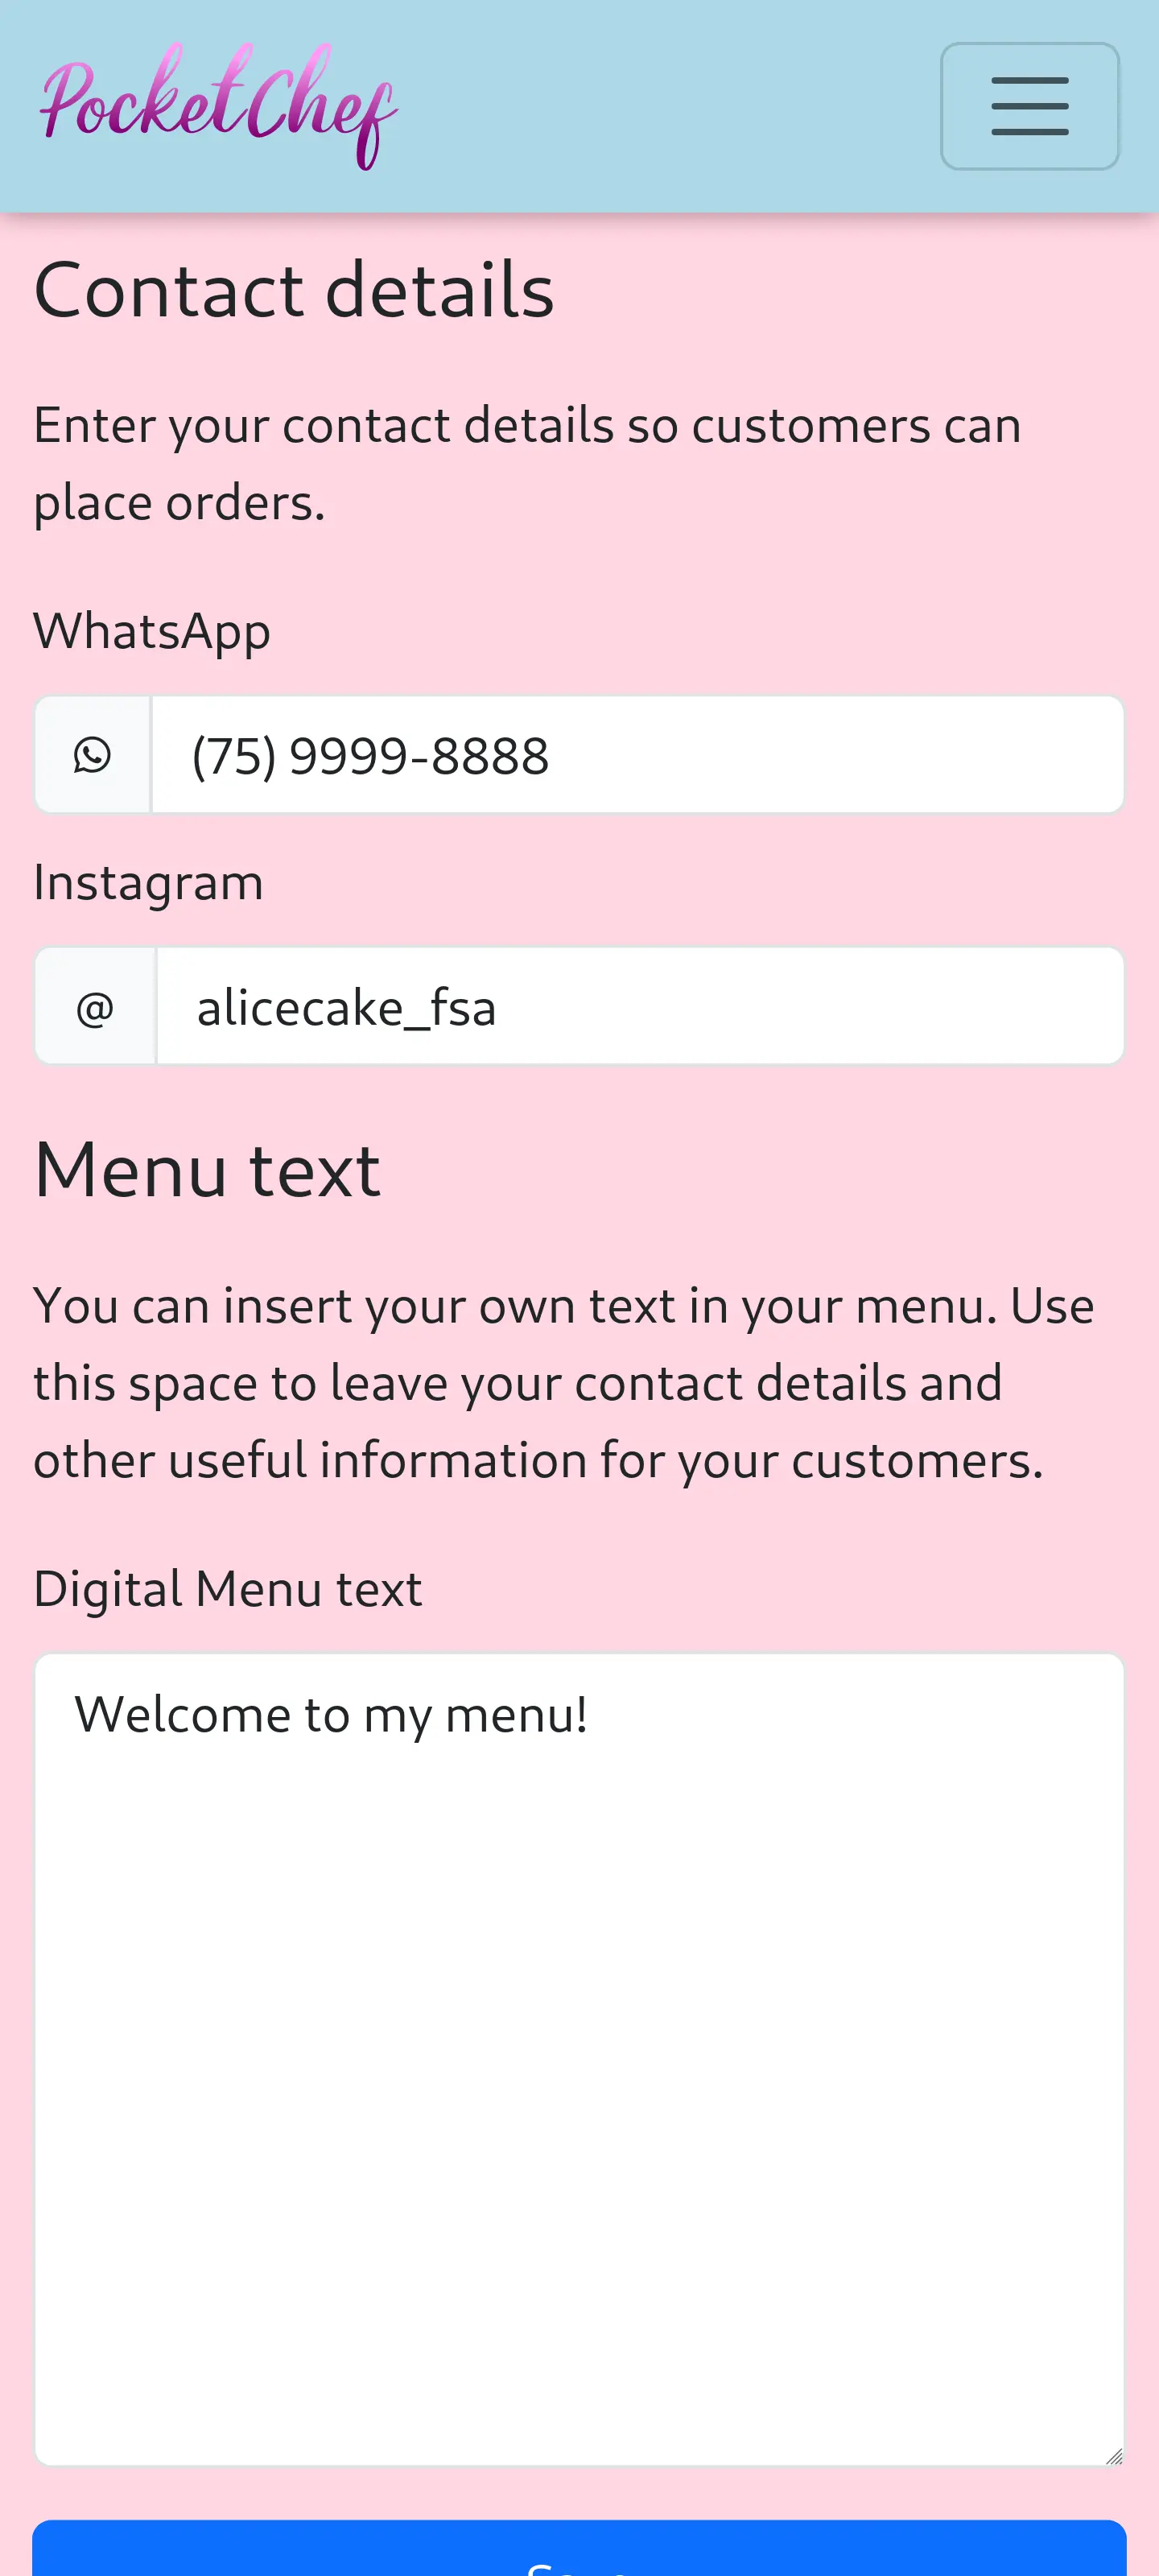
Scrolling further you will reach contact information. There you can enter your WhatsApp number and your Instagram username. PocketChef will generate the buttons so that your customers can contact you via your social networks. If you don't have WhatsApp or Instagram, you can leave it blank.
The last configuration of Digital Menu is Menu text. Use this box to enter a text of your choice and it will appear at the top of your menu. You can write about your business, other forms of contact, payment methods, etc. You are free to write whatever you want.
We have finished this step. Now let's define the recipes that will appear in Digital Menu.
2. Recipes configuration
You are the one in charge of your Digital Menu! Therefore, you must inform PocketChef which products will appear in the menu.
The products are the results of your recipes, therefore, you will find the option to display them in the menu within the recipes's editing screen. To define which recipes will be listed in Digital Menu, access the option Recipes in the side menu so that the recipe list appears. To set a recipe to be listed in the menu, click the button next to the recipe and access the option Edit.
Scroll to the bottom of the screen and you will find the option Show this product in your Digital Menu. If you check this option, PocketChef will understand that you want it to display this product in the menu. You can also write a descriptive text to appear in the menu. Use this text to explain more about the product.
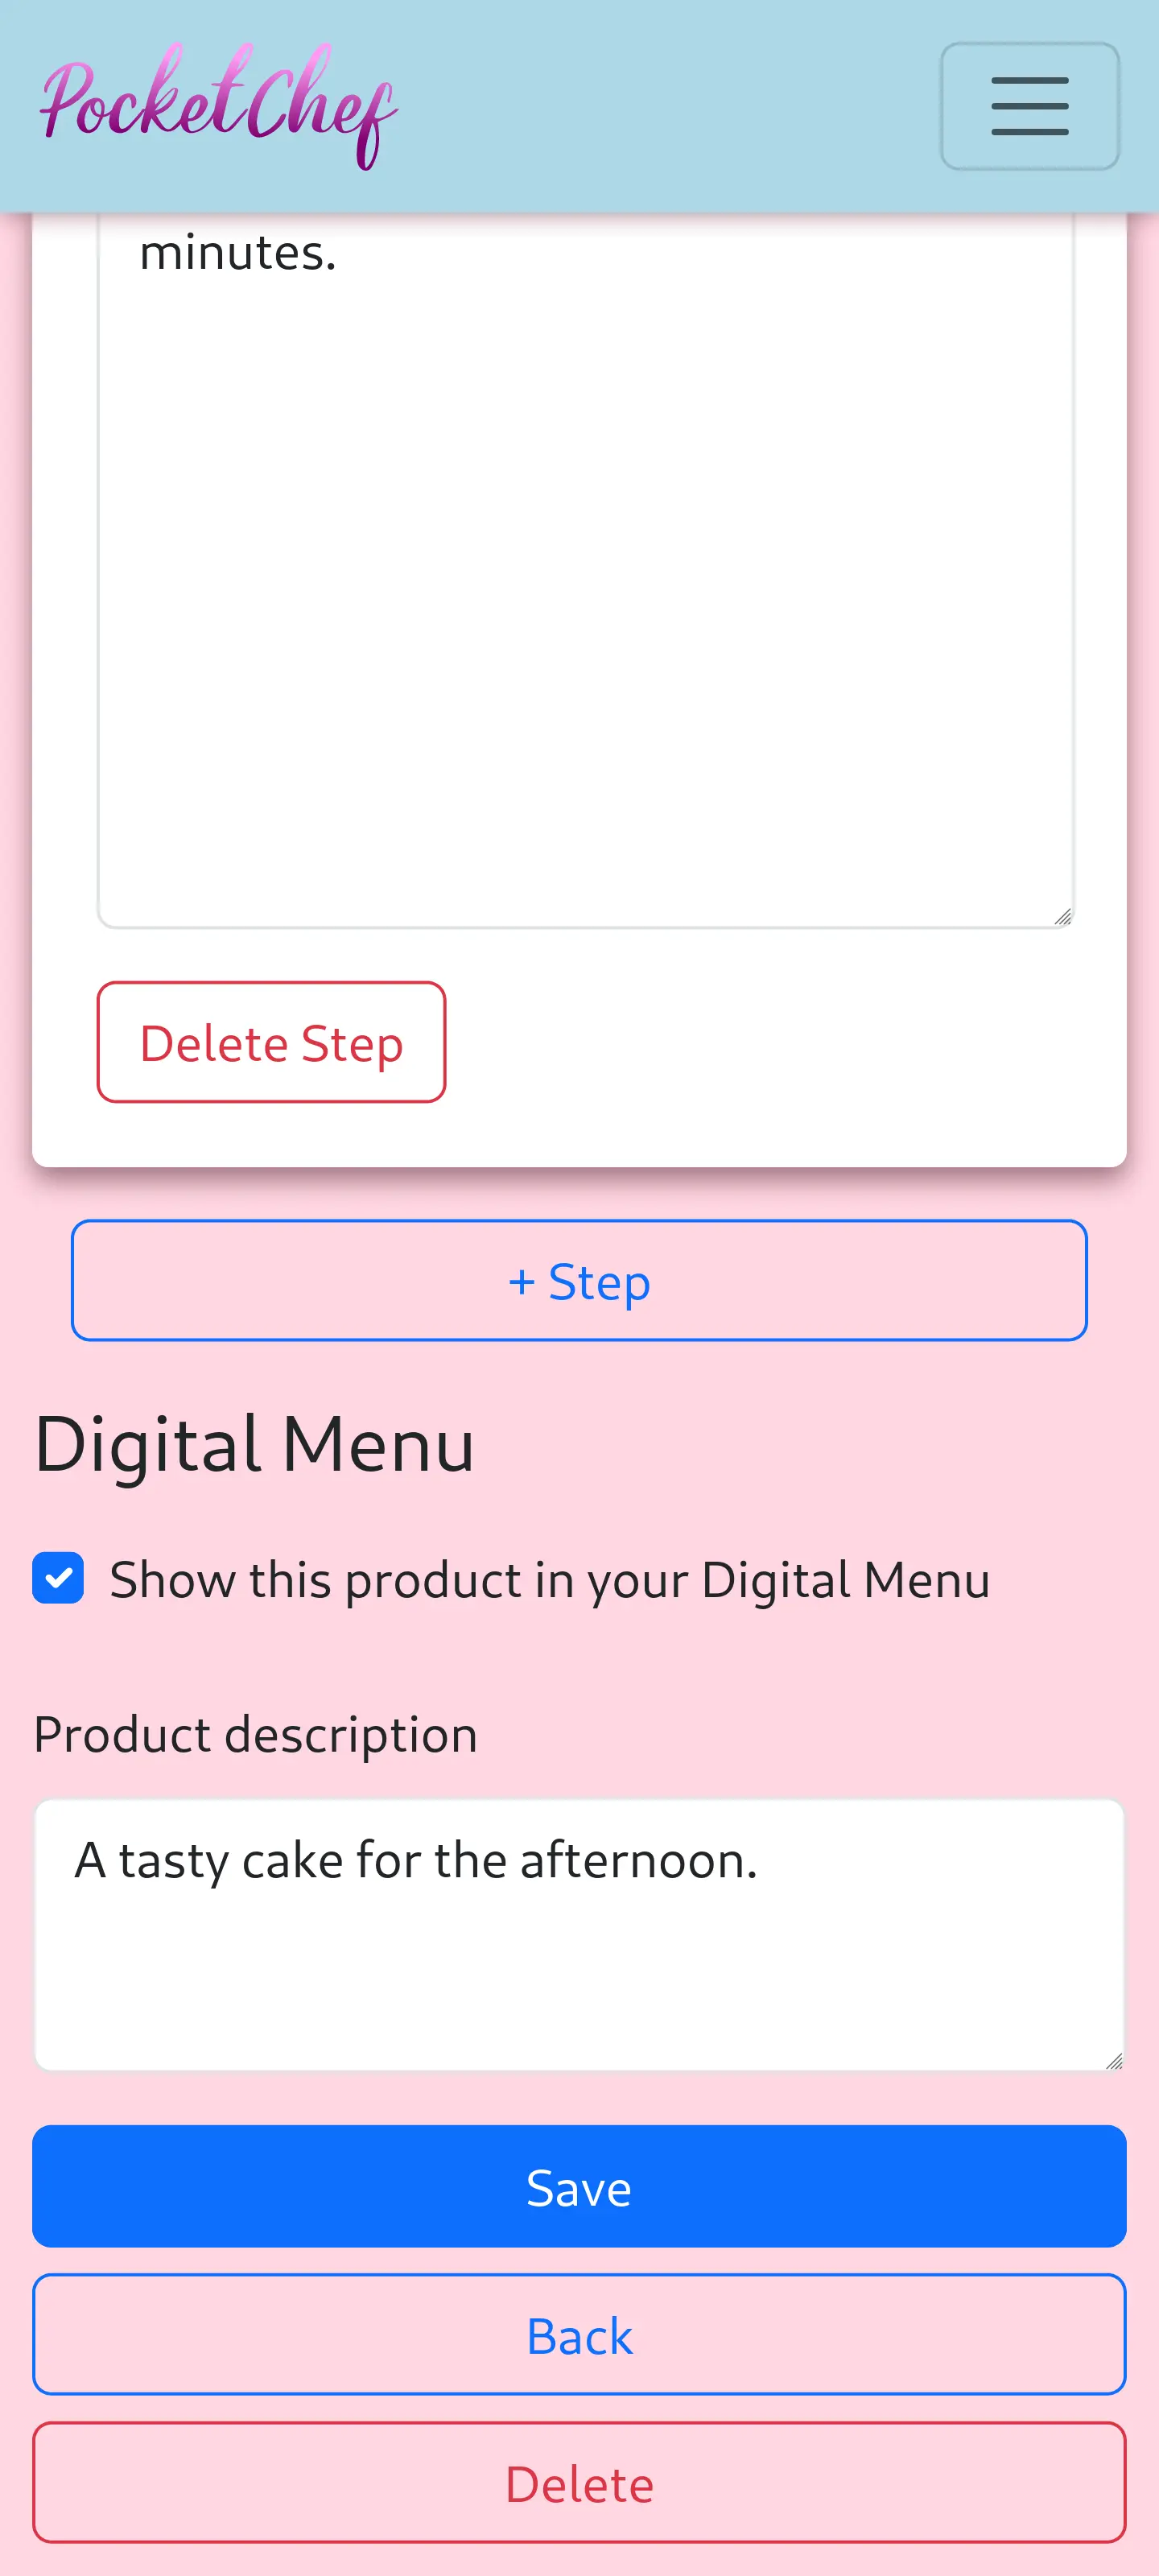
Click on the Save button and the PocketChef will return to the recipes list. Every recipe that is configured to be displayed in the Digital Menu will have the icon next to its name.
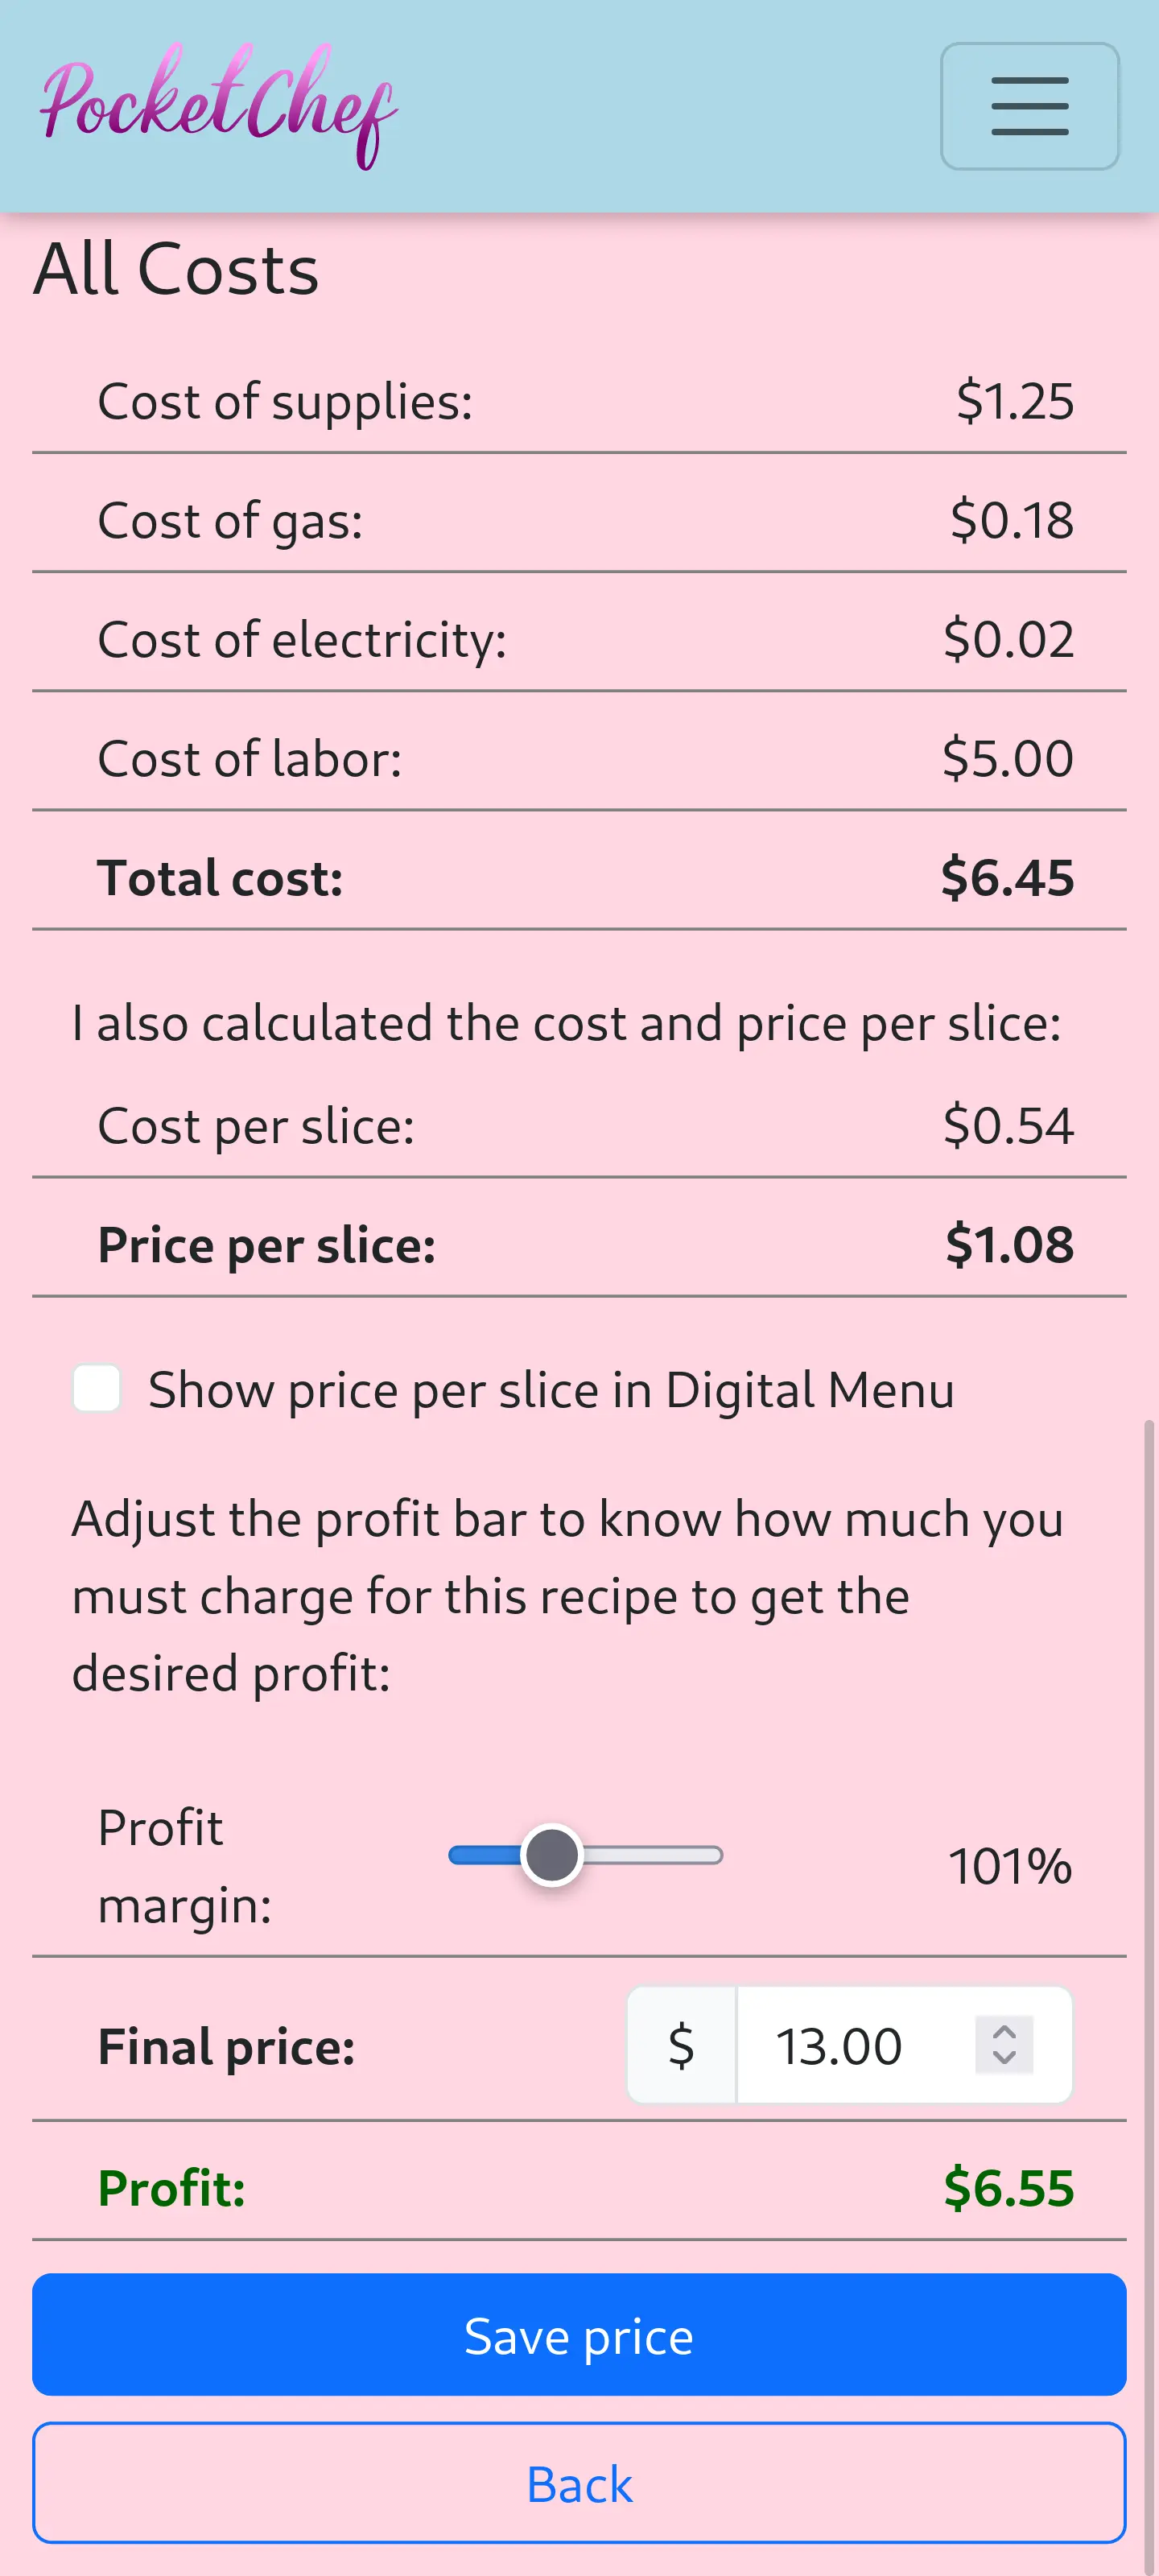
Then click the again and access the option Pricing. Scroll to the bottom of the screen and set the price of your product using the Final price: box. This is the value which will be displayed in the Digital Menu.
If you do not want to disclose the price of a product, simply leave this field blank. PocketChef will display the product, but will not show any price. In this case the customer You will have to contact him to find out the price.
After defining the price, click on the Save price button and PocketChef will return to the recipes list.
Repeat this procedure for each product you want to display in Digital Menu. Also, check which ones you don't want to be displayed. In this case, uncheck the box Show this product in your Digital Menu. After defining which products will appear in Digital Menu let's learn how to share the link with friends and customers!
3. Share the link
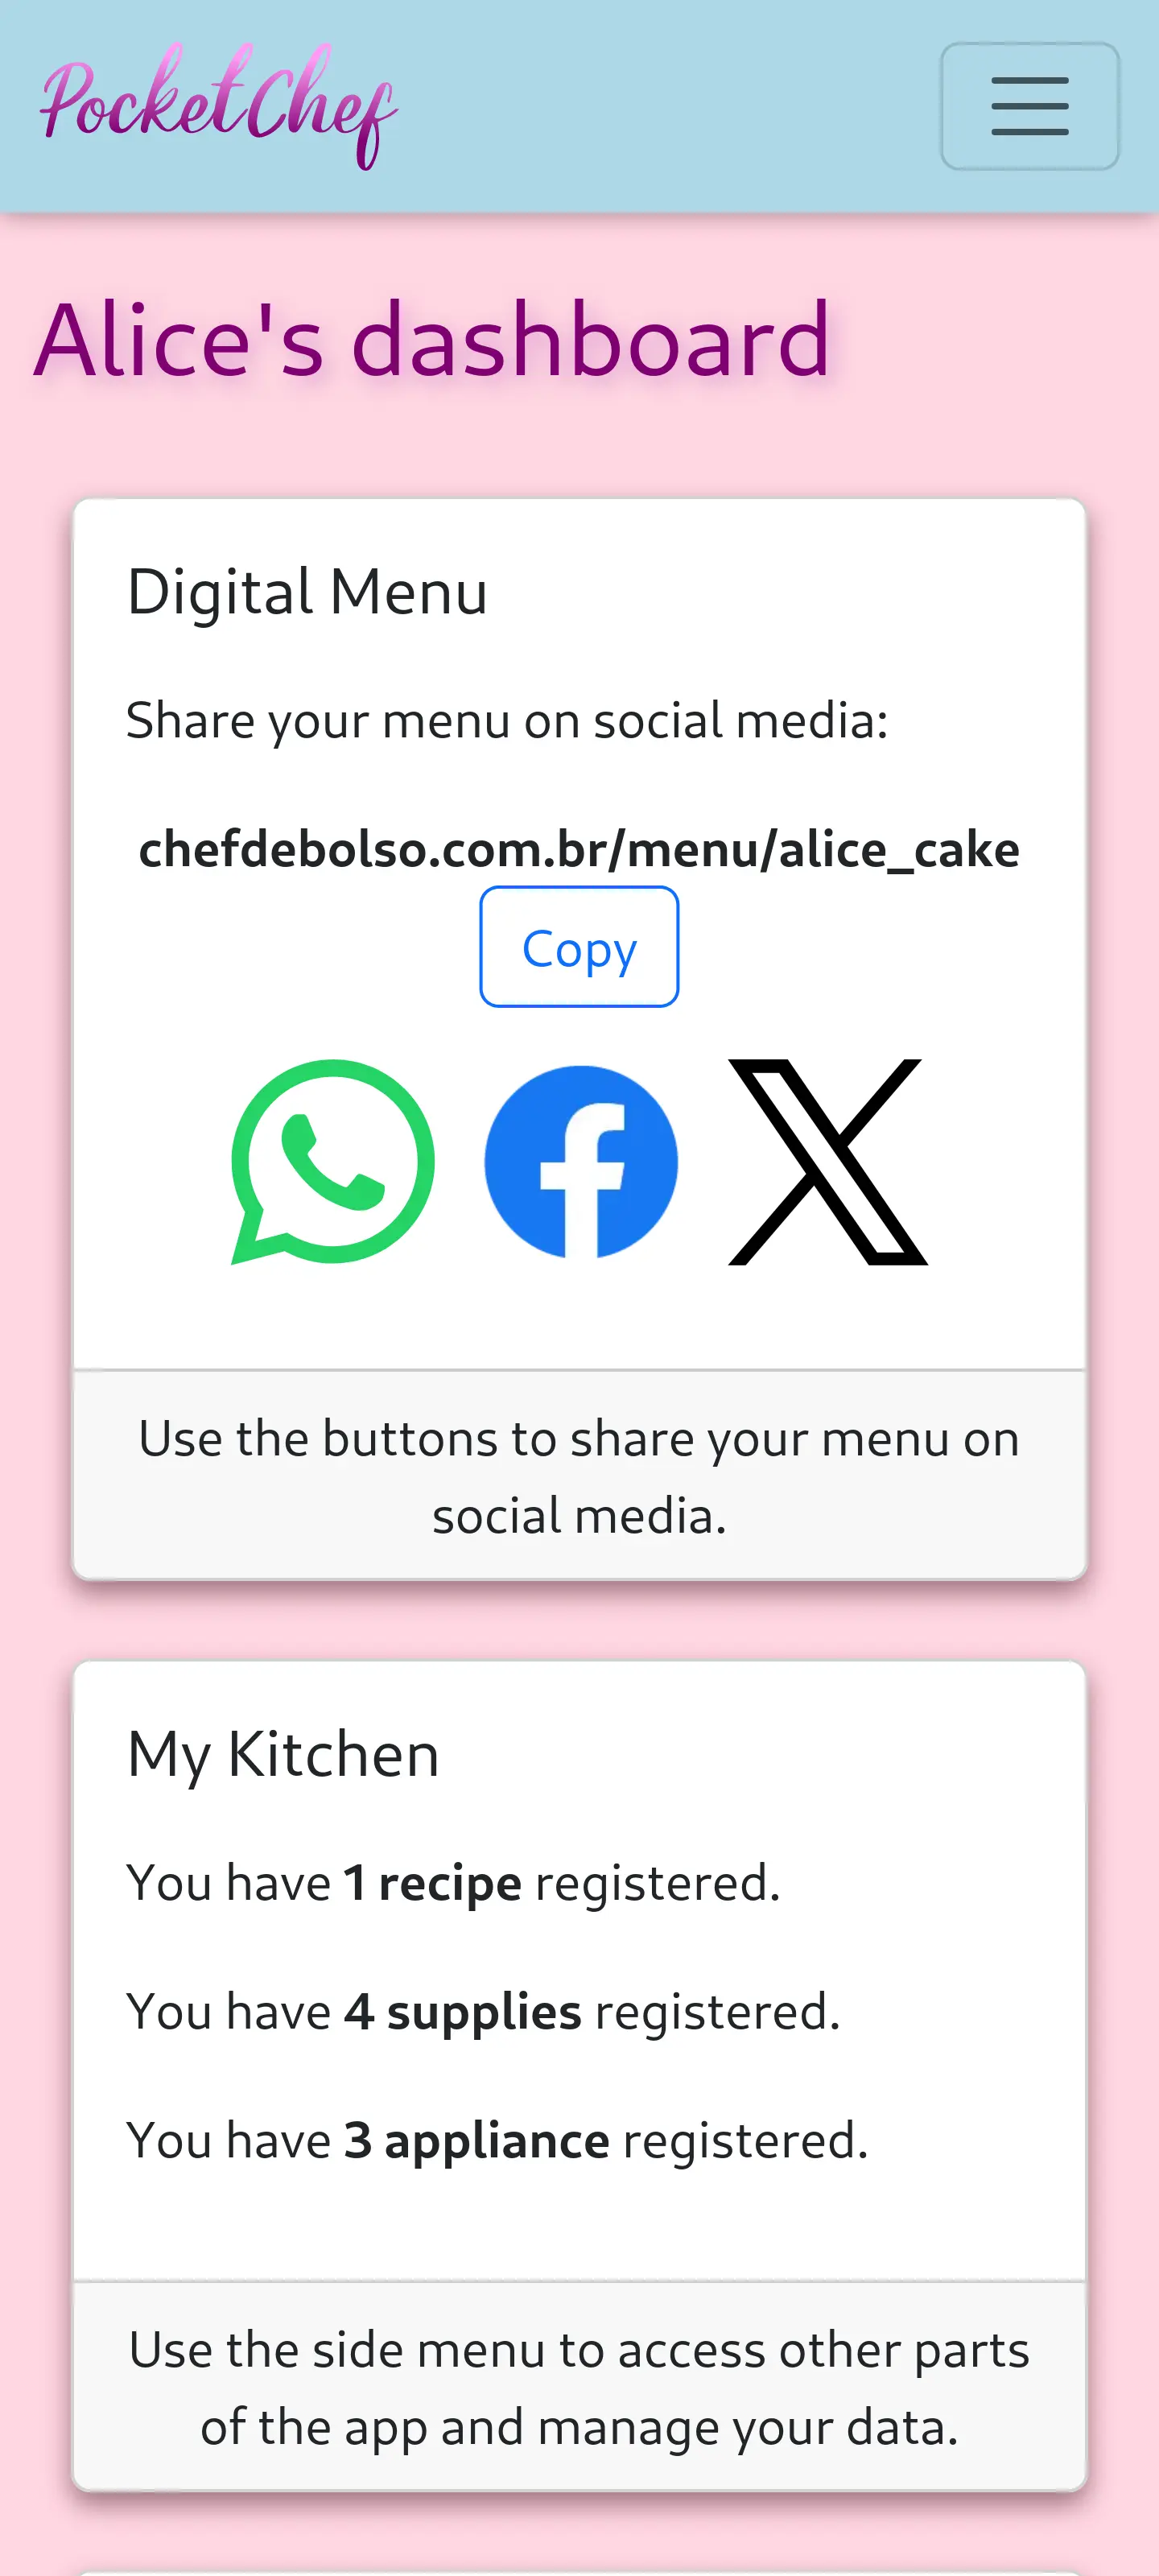
Return to your Dashboard using the side menu. The first card you you will see on the screen is the Digital Menu card. There you will see the link and two buttons to copy and share the link. Use those buttons to share your Digital Menu on social networks.
In addition to this option, PocketChef helps you share directly on WhatsApp, Facebook and X/Twitter. Just click on the icon of one of these social networks that appears on the card and you will be redirected to the post. However, you must already have an account on the social network where you intend to share.
Advertise your work! Use this link on brochures, business cards, packaging and any printed material you use in your production. It's all marketing!
Your Digital Menu is online!
Done! Now your customers will be able to access your menu and contact you online. Whenever you add or remove a product to the menu or if you change the price of any recipe, the Digital Menu will be updated automatically. No need to reconfigure. Enjoy and share the link on all your social networks, so people will know your products and will be able to contact you to place orders.
Remember to keep your product prices updated using the Pricing option of your recipes.
Sign up for free at PocketChef and enable your Digital Menu online 24/7!
Good job!